
Introduction: The Joy of Baking Awaits
There’s something magical about the aroma of freshly baked goods wafting through your home, isn’t there? I still remember the first time I pulled a batch of cookies from the oven: the golden edges, the gooey centers, and that warm, inviting scent that wrapped around me like a cozy blanket. Baking has a way of transforming a mundane day into a celebration, filling your heart with joy and your stomach with deliciousness. It’s not just about the end product; it’s also the process—the whisking, the mixing, the anticipation.
Baking is often hailed as a therapeutic activity, a way to unwind and express creativity. There’s a certain rhythm to it that can soothe the mind, making it a perfect antidote to the chaos of life. Whether you bake alone in quiet contemplation or involve family and friends, each moment spent in the kitchen can foster connection and joy. The best part? You don’t need to be a master chef to create delightful treats. Simple recipes can pave the way for both beginners and seasoned bakers to explore their inner culinary artist.
In this article, we will embark on a delightful journey through simple recipes and techniques that will not only satisfy your sweet tooth but also enrich your life. So, grab your apron and let’s get started on this flavorful adventure!
“Creating a cozy reading nook is all about maximizing comfort in a small space. It’s about intentional design that serves both function and feeling.”
– Interior Design Magazine
The Essentials of Baking: Tools and Ingredients
Before diving into the world of baking, it’s essential to equip yourself with the right tools and ingredients. A well-stocked kitchen can make all the difference in your baking experience. Here’s a quick overview of the basic tools every baker should have:
| Baking Tool | Purpose | Tip |
|---|---|---|
| Mixing Bowls | For combining ingredients | Opt for various sizes |
| Measuring Cups | For accurate ingredient measurements | Use dry and liquid measuring cups |
| Spatulas | For mixing and scraping | Silicone spatulas are versatile |
| Baking Sheets | For cookies and pastries | Invest in heavy-duty sheets for even baking |
| Whisk | For mixing batter | A balloon whisk is great for aerating |
In addition to tools, having a well-stocked pantry is crucial. Here’s a list of essential ingredients that form the backbone of most baking recipes:
- All-purpose flour
- Granulated sugar
- Baking powder and baking soda
- Salt
- Unsalted butter
- Eggs
- Vanilla extract
- Milk or buttermilk
Quality ingredients can elevate your baking, so it’s worth investing in fresh, high-quality staples. Local farmer’s markets, specialty shops, or reputable grocery stores often carry the best products. As you gather your ingredients, consider stocking a beginner’s baking kit with these essentials to make your baking experience seamless and enjoyable.
Mastering the Basics: Essential Baking Techniques
Understanding fundamental baking techniques is key to your success in the kitchen. Here are some essential methods you should be familiar with:
– Mixing: This involves combining ingredients until they’re just blended. Over-mixing can lead to tough baked goods, so mix until combined.
– Creaming: This technique involves beating butter and sugar together until the mixture is light and fluffy. This incorporates air and helps to create a tender texture in cakes.
– Folding: A gentle technique used to combine delicate ingredients like whipped cream or egg whites into a batter without deflating them.
Baking also comes with its own vocabulary. Familiarizing yourself with these common terms can enhance your baking prowess:
| Baking Term | Definition |
|---|---|
| Kneading | The process of working dough to develop gluten |
| Sifting | Breaking up clumps in dry ingredients and incorporating air |
| Proofing | Allowing dough to rise before baking |
Accurate measuring is crucial in baking, as even a small deviation can affect the outcome. Use dry measuring cups for flour and sugar, and liquid measuring cups for milk and water. Always level off dry ingredients with a straight edge for precision. Common mistakes include opening the oven door too soon or using expired ingredients, so keep an eye on your baking and trust your instincts.
Simple Sweet Treats: Cookies that Bring Smiles
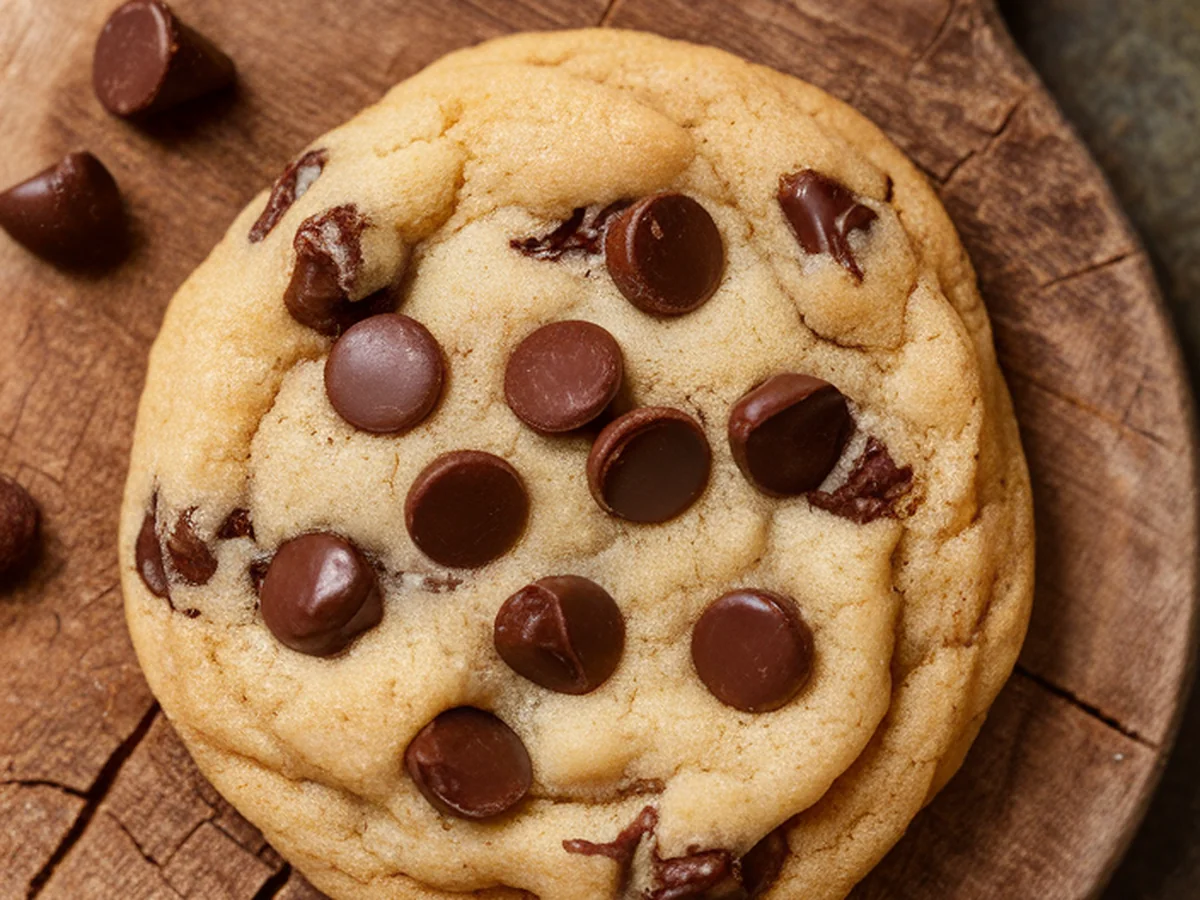
Let’s dive into the sweet side of baking with a classic—chocolate chip cookies! Here’s a simple recipe that’s perfect for beginners and sure to bring smiles to everyone who tries them.
Basic Chocolate Chip Cookie Recipe
Ingredients:
- 1 cup unsalted butter, softened
- 3/4 cup granulated sugar
- 3/4 cup brown sugar
- 1 teaspoon vanilla extract
- 2 large eggs
- 2 1/4 cups all-purpose flour
- 1 teaspoon baking soda
- 1/2 teaspoon salt
- 2 cups chocolate chips
Instructions:
1. Preheat your oven to 350°F (175°C).
2. In a large bowl, cream together the softened butter, granulated sugar, brown sugar, and vanilla extract until smooth.
3. Beat in the eggs one at a time, mixing well after each addition.
4. In another bowl, combine the flour, baking soda, and salt. Gradually add to the butter mixture and stir until just blended. Fold in the chocolate chips.
5. Drop by rounded tablespoons onto ungreased baking sheets.
6. Bake for 9-11 minutes or until golden brown. Allow to cool on the baking sheets for a few minutes before transferring to wire racks.
This basic recipe can be easily customized. You can add nuts for extra crunch, or swap chocolate chips for dried fruit or gluten-free alternatives. To make your cookies visually appealing, consider drizzling melted chocolate or sprinkling sea salt on top before baking. Sharing these cookies with friends and family is where the real joy lies; nothing beats the happiness of biting into a warm cookie straight from the oven.
Deliciously Easy Cakes: From Batter to Bliss
Cakes are often the centerpiece of celebrations, and you don’t need to be a professional baker to create a delicious one. A simple vanilla sponge cake is a great starting point.
Easy Vanilla Sponge Cake Recipe
Ingredients:
- 1 cup unsalted butter, softened
- 1 1/2 cups granulated sugar
- 3 large eggs
- 2 teaspoons vanilla extract
- 2 cups all-purpose flour
- 1 tablespoon baking powder
- 1/2 teaspoon salt
- 1 cup milk
Instructions:
1. Preheat your oven to 350°F (175°C) and grease two 9-inch round cake pans.
2. In a large bowl, cream together the butter and sugar until light and fluffy. Add the eggs one at a time, then stir in the vanilla extract.
3. In a separate bowl, mix the flour, baking powder, and salt. Gradually add to the creamed mixture alternately with the milk, starting and ending with the flour mixture. Mix until just combined.
4. Divide the batter evenly between the prepared pans and smooth the tops.
5. Bake for 25-30 minutes, or until a toothpick inserted in the center comes out clean. Let cool in the pans before transferring to wire racks.
Frosting doesn’t have to be daunting! Simple buttercream can be made by beating together butter, powdered sugar, and a splash of milk until fluffy. Decorate the cake with fresh fruits, edible flowers, or sprinkles to add a touch of festivity. Remember, cakes are not just about taste; they are also about the love and effort you put into them.
Breads Made Simple: The Heart of Home Baking
There’s nothing quite like the smell of fresh bread baking in your kitchen. It’s comforting and fulfilling. Let’s explore an easy recipe for no-knead artisan bread that requires minimal effort but delivers maximum flavor.
No-Knead Artisan Bread Recipe
Ingredients:
- 3 cups all-purpose flour
- 1/4 teaspoon instant yeast
- 1 teaspoon salt
- 1 1/2 cups warm water
Instructions:
1. In a large bowl, combine the flour, yeast, and salt. Gradually add the warm water, stirring until a shaggy dough forms.
2. Cover the bowl with plastic wrap and let it rise at room temperature for 12-18 hours, or until the surface is bubbly and the dough has doubled in size.
3. Preheat your oven to 450°F (232°C) and place a Dutch oven (with the lid on) in the oven to heat up.
4. Lightly flour a work surface and turn the dough out. Shape it into a ball and let it rest for 30 minutes.
5. Carefully remove the hot Dutch oven, place the dough inside, cover with the lid, and bake for 30 minutes. Remove the lid and bake for another 15 minutes until golden brown.
The science behind bread-making involves yeast fermentation, which creates bubbles that give bread its airy texture. Tips for achieving the perfect crust include using steam during the first part of baking and allowing the bread to cool completely before slicing. Pair your freshly baked bread with homemade spreads, soups, or salads for a wholesome meal.
Exploring Savory Baking: Quiches and Tarts
Baking doesn’t have to be all about sweets. Savory options like quiches and tarts can be just as delightful and versatile. Here’s a simple quiche recipe that’s perfect for brunch or a light dinner.
Simple Quiche Recipe
Ingredients:
- 1 pre-made pie crust
- 6 large eggs
- 1 cup milk
- 1 cup shredded cheese (cheddar, Swiss, or your choice)
- 1 cup cooked vegetables (spinach, mushrooms, or bell peppers)
- Salt and pepper to taste
Instructions:
1. Preheat your oven to 375°F (190°C).
2. Place the pie crust in a pie dish and pre-bake for 10 minutes.
3. In a bowl, whisk together the eggs and milk. Stir in the cheese, cooked vegetables, salt, and pepper.
4. Pour the egg mixture into the pre-baked crust and bake for 35-40 minutes, or until the filling is set and the top is golden.
5. Allow to cool slightly before slicing and serving.
Savory baking is incredibly versatile. You can use seasonal vegetables and fresh herbs to enhance flavors or even incorporate meats. Homemade quiches and tarts are not only delicious but also a healthier option compared to store-bought varieties. Plus, they’re perfect for sharing at gatherings or enjoying as leftovers!
Baking with Kids: Fun Recipes for Family Bonding
Baking can be a fantastic way to bond with your children while teaching them valuable skills. Kids are often excited to get involved, and there are plenty of recipes that are kid-friendly and fun to make together. One of the easiest is no-bake treats, like rice krispie treats or simple cupcakes.
No-Bake Rice Krispie Treats Recipe
Ingredients:
- 3 tablespoons butter
- 1 package (10 oz) marshmallows
- 6 cups Rice Krispies cereal
Instructions:
1. In a large saucepan, melt the butter over low heat. Add the marshmallows and stir until completely melted and smooth.
2. Remove from heat and add the Rice Krispies cereal, mixing until well coated.
3. Press the mixture into a greased 9×13-inch pan and allow to cool before cutting into squares.
Involving children in baking fosters creativity and teaches them about measurements and following instructions. Always prioritize safety, ensuring they’re aware of hot surfaces and sharp utensils. Themed baking sessions, such as decorating cupcakes for a birthday party or making holiday treats, can make the experience even more enjoyable. These moments spent in the kitchen can become cherished memories for your family.
The Final Touch: Presentation and Sharing Your Creations
Presentation is key in baking, especially if you plan to share your creations with others. A beautifully styled cake or a neatly arranged platter of cookies can elevate your baked goods from ordinary to extraordinary. Here are some tips for presenting your baked items:
- Use colorful plates or platters to make your treats stand out.
- Garnish with fresh herbs, edible flowers, or a dusting of powdered sugar.
- Consider creative packaging if you’re gifting your baked goods, such as decorative boxes or cellophane bags.
Social media is a great platform to showcase your baking journey. Take well-lit photos of your creations and share them with friends and family. Consider hosting a baking party where everyone brings their favorite treats to share, creating a delightful community of bakers.
As you share your baked creations, remember that the joy of baking lies not just in the final product but in the love and effort you put into each recipe. Celebrate your baking journey, and don’t hesitate to let your creativity shine!
Conclusion: Embrace Your Baking Adventure
Baking is more than just a way to satisfy your sweet tooth; it’s a fulfilling, joyful experience that can bring people together. From simple cookies to hearty breads and savory tarts, the possibilities are endless. As you embark on your baking adventure, embrace the creativity and joy that comes with it.
Don’t shy away from experimenting with flavors, mixing ingredients, or even making mistakes—each step is a part of your unique baking journey. I encourage you to try out the recipes shared in this article and make them your own. Share your experiences, your triumphs, and even your challenges with others.
Baking can be a delightful way to connect with family and friends, create cherished memories, and indulge in the simple pleasures of life. So, roll up your sleeves, preheat that oven, and let your inner baker shine!
Frequently Asked Questions
What are some common baking mistakes I should avoid?
One of the most common mistakes is not measuring ingredients accurately. Baking is a science, and precise measurements are crucial. Always level off dry ingredients and use the correct measuring cups for liquids. Another mistake is opening the oven door too often, which can cause the temperature to fluctuate. Lastly, make sure your ingredients are fresh, as expired baking powder or flour can ruin your baked goods.
How can I make my baked goods healthier?
There are several ways to create healthier baked treats. You can substitute some of the all-purpose flour with whole wheat flour for added fiber. Reducing sugar by 25% often doesn’t affect the taste too much, while using natural sweeteners like honey or maple syrup can also be a healthier option. Additionally, incorporating fruits and vegetables, such as bananas or zucchini, can enhance nutrition without sacrificing flavor.
Can I bake with alternative flours like almond or coconut flour?
Yes! Alternative flours like almond or coconut flour can be used for gluten-free baking or to add different flavors and textures. However, they behave differently than regular flour, so adjustments in liquid and binding agents may be necessary. It’s often helpful to look for specific recipes designed for these flours to ensure the best results.
What’s the best way to store baked goods?
Proper storage is key to keeping your baked goods fresh. For cookies and cakes, store them in an airtight container at room temperature for a few days. If you want to keep them longer, consider freezing them. For bread, wrapping it in plastic wrap and then aluminum foil can help maintain freshness. Always remember to cool baked goods completely before storing them to prevent moisture buildup.
How can I involve my kids in the baking process?
Involving kids in baking can be a fun and educational experience. Start with simple recipes that require minimal skills, such as no-bake treats or decorating cupcakes. Encourage them to measure ingredients, mix batter, or choose decorations. Always prioritize safety and supervision, especially around hot surfaces and sharp utensils. The key is to make it a joyful experience rather than a chore!