
Introduction
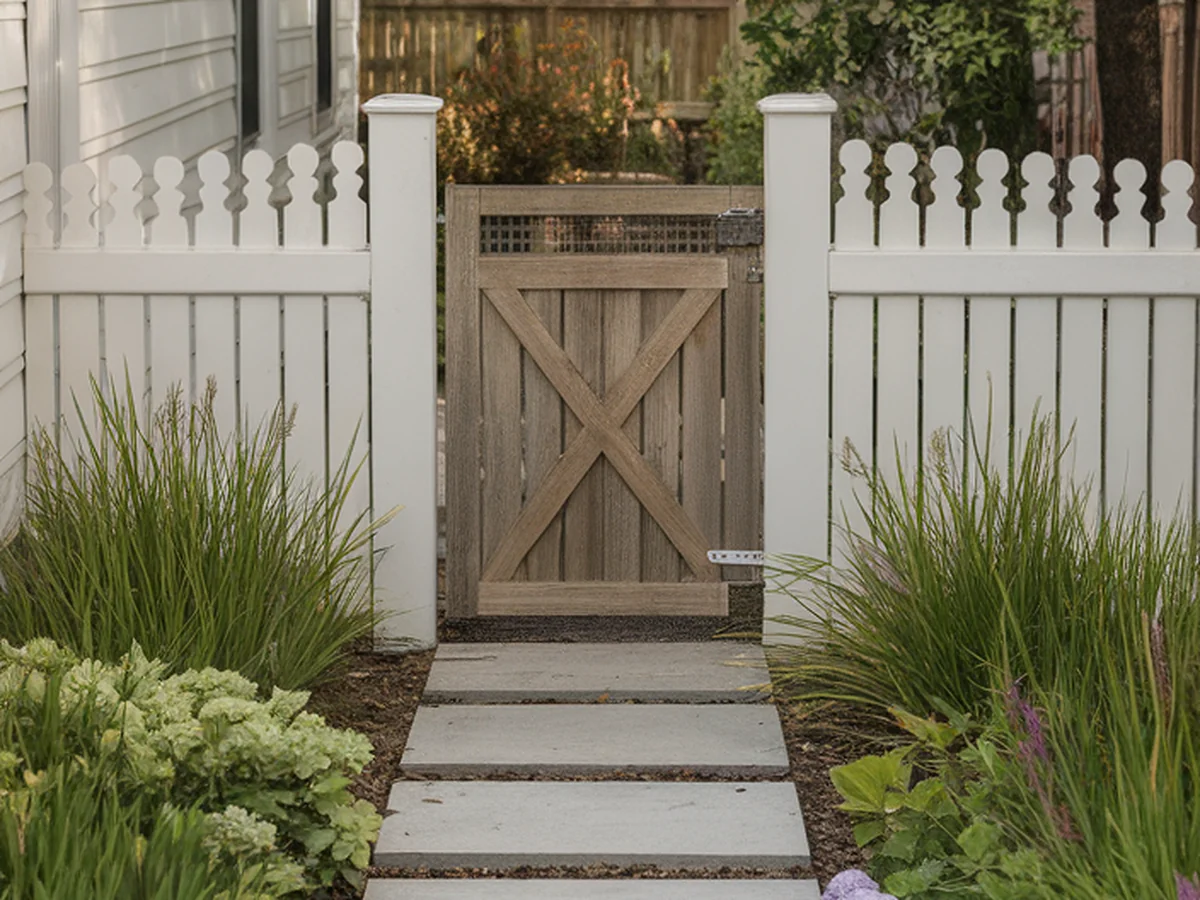
Creating an inviting outdoor space can significantly enhance the overall aesthetics of your home. It’s not just about having a pretty garden or a cozy patio; outdoor areas serve as extensions of our living space, providing a sanctuary for relaxation and social gatherings. Among the many elements that can elevate your outdoor design, walkways stand out as focal points that guide the eye and the foot. A well-defined walkway can lead visitors through your garden, connecting different areas while adding structure and charm.
Embarking on DIY projects allows you to personalize your outdoor space without breaking the bank. Not only can you save money, but you also have the opportunity to express your unique style and creativity. The satisfaction of completing a project with your own hands is unmatched. In this article, you’ll discover a range of creative and budget-friendly DIY walkway ideas that will transform your outdoor space into a charming haven.
“Creating a cozy reading nook is all about maximizing comfort in a small space. It’s about intentional design that serves both function and feeling.”
– Interior Design Magazine
Understanding the Purpose of Walkways
Walkways serve multiple functions in landscaping, making them an essential component of any outdoor design. Primarily, they guide foot traffic, providing a clear path through your yard or garden while enhancing accessibility. This is especially important for those who may have mobility issues or for families with children. However, walkways do more than just facilitate movement; they also create visual interest by drawing the eye to different outdoor areas, such as flower beds, seating areas, or water features.
Moreover, a well-constructed walkway can significantly boost your property’s value and curb appeal. Potential buyers are often drawn to homes with attractive landscaping, and a stylish walkway can make a lasting first impression. It’s also worth noting that an aesthetically pleasing walkway can complement the architecture of your home, creating a cohesive look that ties together your outdoor and indoor spaces.
In essence, the purpose of a walkway extends beyond mere functionality. It’s an invitation to explore your outdoor space, a pathway that enhances beauty, and a valuable investment in your property’s appeal.
Choosing the Right Materials for Your DIY Walkway
When it comes to selecting materials for your DIY walkway, there are several options to consider, each with its own pros and cons. Common choices include gravel, pavers, and natural stone, and each material can drastically affect the look and feel of your walkway.
| Material | Cost | Durability |
|---|---|---|
| Gravel | Low | Moderate |
| Pavers | Moderate | High |
| Natural Stone | High | Very High |
If you’re environmentally conscious, consider eco-friendly options such as reclaimed materials or permeable pavers that allow water to drain through, reducing runoff. Additionally, it’s crucial to take local climate and soil conditions into account when selecting materials; some materials perform better in certain environments than others.
For affordable sourcing, check out local suppliers or salvage yards for reclaimed materials, which can offer a unique touch to your walkway without the hefty price tag. The key is to choose materials that align with your budget, aesthetic preferences, and local conditions, paving the way for a successful DIY project.
Designing Your Walkway: Key Considerations
Designing your walkway involves more than just picking a material; it’s about creating a flow that enhances your outdoor space. Layout options can vary from straight paths that offer a clean, modern look to curved designs that add a touch of whimsy. Consider how the shape of your walkway will affect the overall flow and visual appeal of your yard. Curved walkways, for example, can create a sense of adventure, leading visitors on a journey through your garden.
Width is another important consideration. A walkway should be wide enough to accommodate foot traffic comfortably while also maintaining aesthetic appeal. Typically, a width of 3 to 4 feet is ideal for welcoming guests and ensuring accessibility.
Moreover, integrating your walkway with existing landscaping can enhance its charm. Think about how it will interact with flower beds, trees, and outdoor features like benches or fountains. You might even want to incorporate unique shapes or patterns that reflect your personal style. A well-designed walkway not only serves its purpose but also becomes a beautiful feature of your outdoor space.
Step-by-Step Guide to Building a Gravel Walkway
Building a gravel walkway can be a rewarding project, and it’s one of the most budget-friendly options available. Here’s a step-by-step guide to help you get started:
1. Planning: Determine the path you want your walkway to take. Use stakes and string to outline its shape, ensuring it flows well with your garden’s natural features.
2. Excavation: Remove the top layer of sod and soil where the walkway will be, digging down about 4-6 inches. This depth will accommodate the gravel base and ensure proper drainage.
3. Edging: Install edging along the sides of the walkway to keep the gravel contained. This can be made from wood, metal, or stone.
4. Base Layer: Add a layer of landscape fabric to prevent weed growth. Then, fill the excavated area with 2-3 inches of crushed stone for drainage, leveling it out with a rake.
5. Gravel Installation: Finally, pour 2-3 inches of your chosen gravel material on top of the base layer. Use a tamper to pack it down, ensuring a stable surface.
6. Finishing Touches: Add decorative stones or plants along the edges for a polished look.
One key tip is to ensure proper drainage. You might want to create a slight slope away from your home to prevent water from pooling. Regular maintenance, such as replenishing gravel and removing weeds, will keep your walkway looking its best.
Creating a Charming Paver Walkway
Paver walkways are a versatile and stylish option that allows for a high degree of customization. With a variety of shapes, sizes, and colors available, you can create a look that complements your home’s architecture and your personal style. Here’s how to build a charming paver walkway:
1. Measuring: Start by measuring the area where you will lay the pavers. Mark the outline with stakes and string.
2. Excavation: Similar to the gravel walkway, remove the sod and soil to a depth of about 6-8 inches, which will accommodate the paver base and the pavers themselves.
3. Base Layer: Lay down a 4-inch layer of crushed stone or gravel, compacting it to create a stable base.
4. Sand Layer: Add a 1-inch layer of sand on top of the crushed stone. This layer will help level the pavers and provide a smooth surface.
5. Placing Pavers: Start laying the pavers in your desired pattern, ensuring they are snug against each other. You can experiment with different layouts, such as herringbone or basketweave, to add character.
6. Cutting Pavers: Use a wet saw or a chisel to cut pavers as needed to fit the edges of your walkway.
7. Finishing: Once all pavers are laid, sweep sand into the joints to lock them in place and prevent shifting.
A solid base and proper leveling are essential to prevent shifting and ensure durability. By incorporating patterns or borders, you can enhance the visual appeal and create a unique walkway that complements your outdoor space.
Incorporating Natural Elements: Stone and Wood Walkways
For those who prefer a rustic charm, natural stone and reclaimed wood walkways can add an earthy feel to your outdoor space. These materials blend beautifully into natural landscapes, creating a seamless transition between your home and garden.
When sourcing materials, look for local stone suppliers or reclaimed wood yards. Natural stones can be used as stepping stones, while reclaimed wood can be cut into planks or logs for a more organic appearance.
To install a stone walkway, follow these steps:
1. Planning: Lay out the path using stakes and string. Consider using larger stones for a more stable surface.
2. Excavation: Remove soil to create a level base, approximately 4-6 inches deep.
3. Base Layer: Add gravel or sand to create a stable foundation that facilitates drainage.
4. Placement: Lay the stones in your desired pattern, leaving small gaps for plants or ground cover to grow.
For a wood walkway, consider these steps:
1. Planning: Outline the walkway path and decide on the width and spacing of the wood pieces.
2. Preparing Wood: Sand down any rough edges and treat the wood with a weather-resistant sealant.
3. Installation: Lay the wood planks or logs in your desired configuration, securing them with stakes or brackets to prevent shifting.
4. Finishing Touches: Add mulch or low-maintenance ground cover around the edges to blend the walkway into the landscape.
Natural materials bring warmth and beauty to your outdoor space, and their organic textures can create a soothing environment.
Enhancing Your Walkway with Decorative Features
Once your walkway is in place, it’s time to make it truly your own by adding decorative features. Integrating elements like lighting, garden borders, or stepping stones can infuse personality and charm into your walkway.
Consider installing solar-powered path lights along the edges to enhance visibility and safety at night. Not only do they illuminate the path, but they also create a warm ambiance for evening strolls or gatherings.
Garden borders can be created using plants, flowers, or decorative stones that frame your walkway, softening the edges and integrating the path with your garden. You can choose low-maintenance plants that will thrive in your climate, ensuring that your walkway remains inviting year-round.
Moreover, seasonal decorations can keep the walkway looking fresh and welcoming. Consider adding festive décor for holidays or seasonal flowers to reflect changing times. This not only enhances the walkway’s charm but also invites guests to enjoy the beauty of your outdoor space.
Maintaining Your DIY Walkway for Longevity
To ensure your DIY walkway remains beautiful and functional, regular maintenance is key. Here’s a checklist of tasks to help you keep your walkway in top shape:
– Cleaning: Regularly sweep away debris, leaves, and dirt to prevent staining and maintain its appearance.
– Repairs: Inspect for any loose pavers, shifting stones, or eroded gravel. Address these issues promptly to prevent further deterioration.
– Weed Control: Implement preventive measures against weed growth, such as using mulch or landscape fabric beneath the walkway materials.
– Seasonal Care: Depending on your walkway type, consider seasonal tasks, like adding fresh gravel or sand, sealing wood, or cleaning pavers.
– Inspections: Periodically assess the walkway’s condition, especially after heavy rains or storms, to ensure safety and aesthetics.
By keeping up with maintenance, you can extend the life of your walkway and maintain its beauty, allowing it to continue being a charming element of your outdoor space.
Conclusion
DIY walkways have the power to transform your outdoor space, serving as both functional paths and beautiful features that enhance your home’s charm. By embracing your creativity and taking on a DIY project, you can create a walkway that reflects your unique style while staying within budget. From gravel to pavers to natural stone and wood, the options are endless, allowing you to customize your outdoor experience.
So why wait? Start envisioning your dream outdoor space today and take that first step toward realization. Your charming walkway is just a project away, ready to welcome you and your guests with open arms.
Frequently Asked Questions
What is the best material for a DIY walkway?
The best material for a DIY walkway depends on your budget, aesthetic preferences, and local climate conditions. Gravel is a cost-effective and easy-to-install option, while pavers offer durability and a wide range of styles. Natural stone and reclaimed wood provide rustic beauty but may require more effort for installation. Consider your specific needs and consult with local suppliers to determine the best choice for your project.
How do I ensure proper drainage for my walkway?
Proper drainage is essential for the longevity of your walkway. To ensure adequate drainage, create a slight slope away from your home and incorporate a gravel base to facilitate water runoff. Additionally, consider using permeable materials or drainage systems, especially in areas prone to heavy rainfall. Regular maintenance, like clearing debris from the walkway, will also help prevent water pooling.
Can I use recycled materials for my walkway?
Absolutely! Using recycled materials for your walkway is not only eco-friendly but can also add a unique character to your design. Reclaimed bricks, stones, or wood can create a rustic and charming look while reducing waste. Local salvage yards or recycling centers are great places to source materials for your DIY project.
How do I maintain my gravel walkway?
Maintaining a gravel walkway involves regular cleaning and replenishment. Sweep away debris and leaves to prevent staining and weed growth. Additionally, periodically check for areas where gravel may have shifted or settled and fill in those spots as needed. Over time, you may need to add fresh gravel to maintain an even surface and aesthetics.
What decorative features can I add to my walkway?
There are numerous decorative features you can add to enhance your walkway’s charm. Solar-powered lights can illuminate the path while adding ambiance. Planting flowers or shrubs along the edges can soften the look and integrate the walkway with your landscaping. You might also consider adding decorative stones, stepping stones, or seasonal decorations to keep the walkway inviting year-round.