
Introduction: The Allure of Crochet Pumpkins
Crochet has blossomed into a beloved craft for many, offering a delightful blend of creativity and relaxation. The rhythmic movement of yarn and hook brings a sense of satisfaction that transcends the mere act of crafting. Among the myriad of motifs one can create, pumpkins stand out as a versatile and seasonal favorite. These charming creations can usher in the warmth of autumn, evoke the spirit of Halloween, or simply add a touch of whimsy to your decor.
There’s something profoundly gratifying about creating handmade decorations. Each crochet pumpkin you craft holds the essence of your creativity and effort, making it a personal piece of art that can be cherished, gifted, or displayed with pride. In this article, we will explore the delightful journey of creating your own charming crochet pumpkin designs. From understanding crochet basics to gathering materials and showcasing your finished creations, you’ll be guided every step of the way.
“Creating a cozy reading nook is all about maximizing comfort in a small space. It’s about intentional design that serves both function and feeling.”
– Interior Design Magazine
Understanding the Basics of Crochet
Before diving into the world of crochet pumpkins, it’s essential to grasp some basic crochet terms and techniques. Familiarizing yourself with essential stitches such as the chain stitch, slip stitch, and single crochet will set a strong foundation for your pumpkin projects. Knowing how to read a pattern is equally important, as it will enable you to follow along and create beautiful designs.
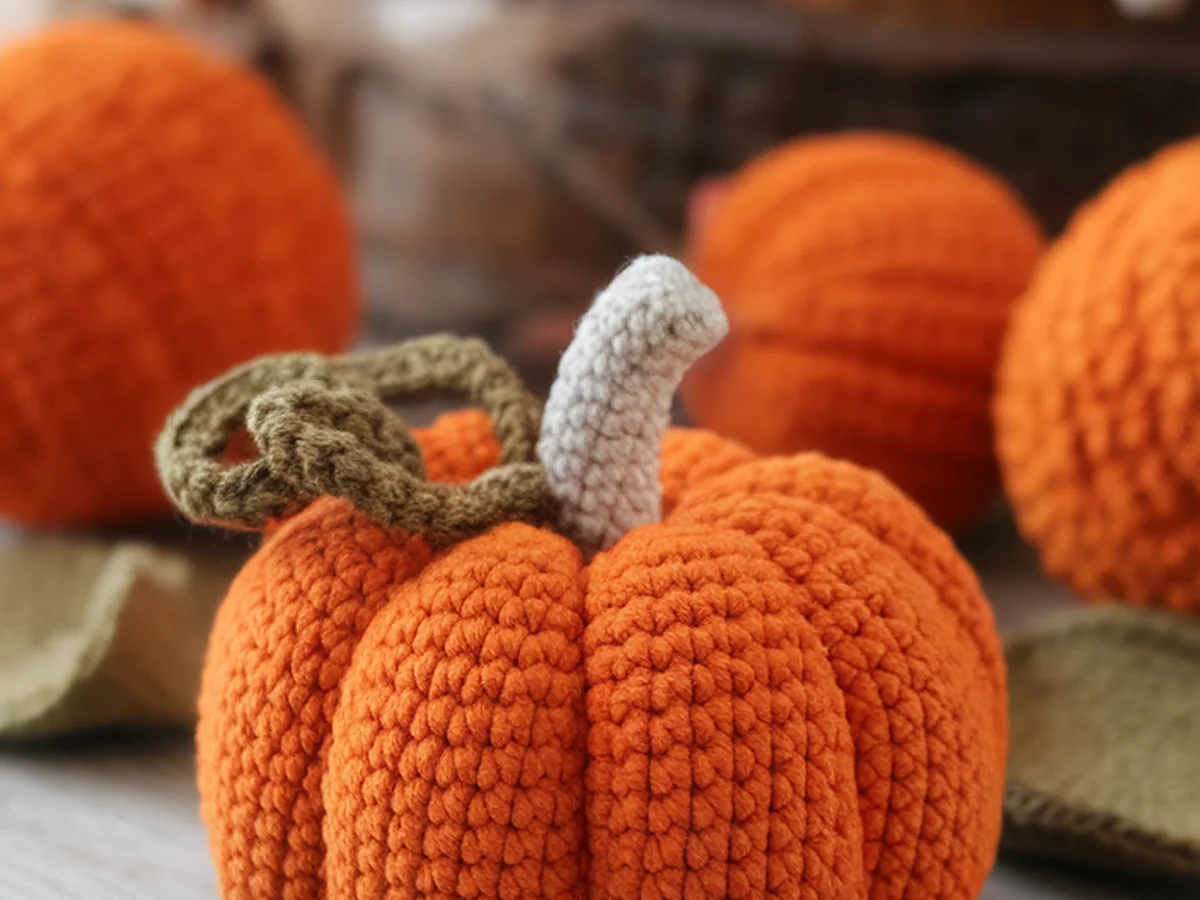
When it comes to choosing your crochet hook, the size will depend on the yarn you select. For pumpkin designs, a medium weight yarn (like worsted weight) paired with a corresponding hook (typically size H/8 or I/9) works wonderfully. Additionally, understanding yarn types is crucial; cotton yarn is ideal for a more structured pumpkin, while acrylic yarn offers a softer, fluffier finish.
For beginners, selecting the right materials can significantly affect your experience. Start with medium-weight yarn in autumnal colors like oranges, greens, and browns. Don’t forget to pay attention to gauge – the number of stitches per inch – as this will influence the final size of your pumpkin. Practice a few basic stitches before starting your project to build confidence.
Choosing Your Pumpkin Design
The beauty of crochet pumpkins lies in the variety of designs you can explore. Whether you prefer realistic pumpkins with intricate details or whimsical versions adorned with playful features, the options are endless. Seasonal themes can also guide your design choices. For instance, Halloween pumpkins might sport spooky faces, while Thanksgiving pumpkins could be more understated and elegant.
Finding inspiration can be as easy as stepping outside and observing nature. The shapes, colors, and textures of real pumpkins can spark your creativity. Online crochet communities, such as Ravelry and Instagram, are also fantastic resources for design ideas. Additionally, crochet books often feature patterns ranging from simple to complex, catering to various skill levels.
Personalizing your pumpkin designs adds a special touch. Consider incorporating unique colors or embellishments such as leaves, vines, or even tiny faces to make each pumpkin truly one-of-a-kind. The goal is to create something that resonates with your style and the seasonal atmosphere.
Essential Tools and Materials
To embark on your crochet pumpkin journey, you’ll need a few essential tools and materials. Here’s a comprehensive list to get you started:
| Tool/Material | Description | Purpose |
|---|---|---|
| Crochet Hook | Varies in size (H/8 or I/9 for medium weight yarn) | To create stitches |
| Yarn | Cotton or acrylic in desired colors | For the body of the pumpkin |
| Scissors | Sharp, fabric scissors | To cut yarn |
| Stitch Markers | Small clips or rings | To mark specific stitches |
| Tapestry Needle | Large-eyed needle for finishing | For weaving in ends |
Optional embellishments can elevate your pumpkin design. Buttons, beads, or fabric scraps can add character and uniqueness to your creations. If you’re passionate about sustainability, consider sourcing eco-friendly materials, such as organic cotton yarn or recycled fibers, to minimize your environmental impact.
Step-by-Step Patterns for Crochet Pumpkins
Now that you have your materials ready, it’s time to dive into the patterns! Below are some step-by-step guides for different skill levels.
Basic Pumpkin Pattern
For beginners, a simple round pumpkin can be an excellent starting point. This pattern typically involves creating a magic ring, working in rounds, and stuffing the pumpkin to give it shape. The skill level for this project is beginner-friendly, focusing on basic stitches.
Intermediate Design
Once you’ve mastered the basics, consider an intermediate design that incorporates textures. You could create a pumpkin with a bobble stitch or use a combination of stitches to give it a more three-dimensional appearance. This project may require additional techniques like changing yarn colors to enhance your design.
Advanced Techniques
For those who feel adventurous, advanced techniques such as color changes, intricate patterns, or even combining multiple yarn types can yield stunning results. These designs may require more experience but will challenge your skills and expand your crochet repertoire.
You can find numerous resources for crochet patterns online. Websites like Ravelry and Etsy offer a mix of free and paid patterns that cater to all skill levels. As you explore these patterns, remember to personalize them to make your creations uniquely yours.
Incorporating Unique Textures and Finishes
One of the joys of crochet is the ability to play with textures. Different crochet stitches can add depth and interest to your pumpkin designs. For example, the shell stitch creates a wavy texture, while the bobble stitch gives a playful, 3D effect. Experimenting with these stitches can elevate your projects and make them more visually appealing.
Adding embellishments is another way to enhance your creations. Consider crocheting small leaves, vines, or even whimsical faces to adorn your pumpkins. These details can transform a basic design into something extraordinary.
Once you’ve finished crocheting your pumpkins, blocking is an important step to achieve a polished look. Blocking involves wetting and pinning your finished pieces to shape them properly, ensuring they hold their form beautifully. Additionally, consider creating a multi-dimensional effect by stacking different sizes of pumpkins or using different yarn textures to create a visually striking display.
Creative Display Ideas for Your Crochet Pumpkins
After crafting your delightful crochet pumpkins, displaying them creatively can be just as fun as making them! Consider how you can incorporate your pumpkins into your home decor. They can serve as charming table centerpieces, adding warmth to your dining experience, or adorn your mantel, bringing a seasonal touch to your living space.
Seasonal swaps can keep your decor fresh and engaging throughout the year. For instance, you can use your crochet pumpkins during autumn, then transition into winter decorations by swapping in snowmen or winter-themed designs.
DIY displays and arrangements can also enhance the charm of your crochet pumpkins. Place them in rustic baskets, clear glass vases, or even tiered trays for an eye-catching arrangement. When sharing your creations on social media, consider photography tips to showcase their colors and textures. Natural light and simple backgrounds can help your pumpkins shine in every shot.
Joining the Crochet Community
One of the most rewarding aspects of crochet is the sense of community it fosters. Finding local or online crochet groups can provide support and inspiration as you navigate your crafting journey. Websites like Ravelry and Facebook groups are excellent avenues to connect with fellow crocheters, exchange ideas, and share your creations.
Participating in seasonal crochet events or challenges can ignite your passion for the craft. Many online communities host themed challenges where you can showcase your work and gain feedback from others. Engaging with fellow crafters not only enhances your skills but also creates lasting friendships.
Sharing and showcasing your work on platforms like Instagram or Pinterest can be immensely gratifying. Use specific hashtags related to crochet and seasonal themes to connect with others who share your passion. The benefits of engaging with fellow crafters extend beyond learning; they can foster a sense of belonging in the vibrant world of crochet.
Embracing the Creative Journey
Crochet is more than just a craft; it’s a therapeutic outlet that allows you to express your creativity. The repetitive motions can be meditative, providing a sense of calm and focus in our fast-paced lives. As you embark on your crochet pumpkin projects, don’t be afraid to experiment and make the designs your own.
Reflecting on the joy of handmade gifts, each crochet pumpkin you create can become a treasured gift for friends and family or a cherished part of your home decor. The personal touch of handmade items resonates deeply with those who receive them, making your creations even more meaningful.
We invite you to share your experiences and creations with the crochet community. Whether you’re a beginner or an experienced crafter, your journey matters and can inspire others to embrace their creativity.
Conclusion: Celebrate Your Crafting Achievements
In creating your crochet pumpkins, you’ve embarked on a joyful journey filled with creativity, learning, and personal expression. The satisfaction derived from crafting these delightful designs is unmatched, as they become a testament to your skills and dedication.
As you continue to explore further designs and techniques, remember to celebrate each achievement, no matter how small. Crafting is about the journey as much as it is about the final product, so embrace every moment spent with yarn and hook in hand.
Now is the perfect time to start crafting your charming crochet pumpkins. Share your creations with the world and inspire others to join in on the fun. Remember, handmade items leave a lasting impact, adding warmth and personality to our lives.
Frequently Asked Questions
What materials do I need to start crocheting pumpkins?
To start crocheting pumpkins, you’ll need basic tools such as a crochet hook (typically size H/8 or I/9), medium weight yarn in autumn colors, scissors, stitch markers, and a tapestry needle for finishing. Optional embellishments like buttons or beads can also enhance your designs.
Are crochet pumpkins suitable for beginners?
Absolutely! Crochet pumpkins can be a fantastic project for beginners. Start with simple patterns that focus on basic stitches, and as you gain confidence, you can experiment with more complex designs. The key is to enjoy the process and learn at your own pace.
How can I personalize my crochet pumpkin designs?
Personalizing your crochet pumpkin designs can be done through color choices, shapes, and embellishments. Use unique yarn colors, add small crocheted leaves or vines, or even create faces for a whimsical touch. Let your imagination guide you to create one-of-a-kind pumpkins.
What are some creative ways to display my crochet pumpkins?
You can display your crochet pumpkins in various creative ways. Consider using them as table centerpieces, arranging them in baskets or vases, or placing them on mantels. Seasonal swaps can keep your decor fresh, and you can even stack different sizes for an eye-catching arrangement.
How do I find crochet patterns for pumpkins online?
Finding crochet patterns for pumpkins online is easy! Websites like Ravelry, Etsy, and Pinterest offer a plethora of free and paid patterns. You can search for specific designs, skill levels, and seasonal themes to find the perfect pattern that suits your style.